
7 Tips to Choose the Right DC Power Circuit Breaker?
Choosing the right Dc Power Circuit Breaker is not merely a matter of matching voltage and current. A reliable selection begins with the real operating conditions. Consider a 48-volt battery system delivering 125 amps through a cabinet exposed to dust and heat. The breaker must handle continuous load, temporary surges, and the available short-circuit current. Its DC voltage rating should exceed the system voltage, while its interrupting capacity should safely stop the highest expected fault. Small details matter.
This guide presents seven practical tips for evaluating breaker performance, installation, and long-term dependability. It examines pole configuration, trip characteristics, temperature derating, terminal compatibility, arc-extinguishing design, enclosure protection, and maintenance access. A breaker may look suitable on paper yet fail when cables heat up or a motor starts. That is an easy mistake. Reviewing manufacturer test data, certification records, and application notes can reduce uncertainty. A qualified electrical professional should verify the final choice against the equipment design and applicable standards. However, even experienced teams can overlook ambient temperature or future load growth. Rechecking those assumptions is worthwhile. The best Dc Power Circuit Breaker is not always the largest or most expensive model. It is the one that interrupts faults reliably, fits the circuit physically, and performs consistently under actual service conditions.
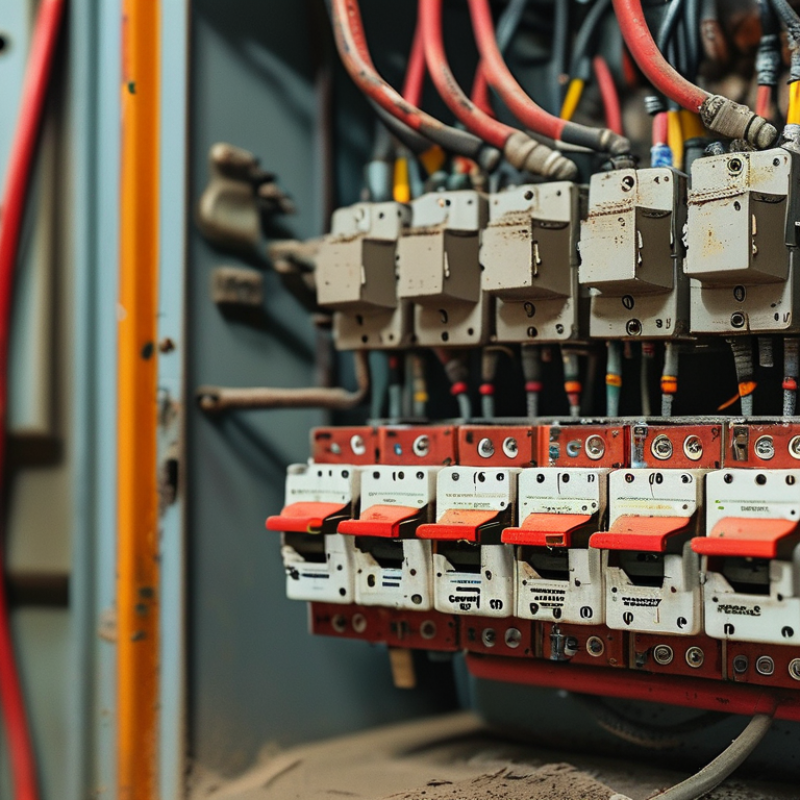
Define the DC Circuit’s Voltage and Current Requirements
Choosing a DC power circuit breaker starts with two numbers: system voltage and operating current. Measure the highest voltage present, not only the nominal 24 V or 48 V label. Batteries, chargers, and long cable runs can create different conditions. A breaker’s DC voltage rating must meet or exceed the circuit’s maximum voltage. DC arcs can persist after contacts separate. This is critical. An AC-rated breaker may not interrupt DC safely, even when its current rating appears adequate.
Determine normal load current, startup current, and possible fault current. Motors, solenoids, and capacitive inputs may draw several times their running current. Measure the peak. Compare these readings with the breaker’s continuous current rating. Select a rating above the expected load, but not so high that the cable loses protection. Check the cable. Its ampacity sets a practical ceiling.
Check the breaker’s interrupting capacity at the actual DC voltage. A battery can deliver far more fault current than a bench supply. Temperature, enclosure ventilation, and altitude may also reduce performance. Verify polarity, because some DC breakers use directional arc-management structures. Test it under load. My early checks focused too much on the label. A second review of cable length and fault current often reveals the real risk. Keep records of measured voltage, current, and trip behavior for future maintenance.
Match the Breaker’s Ratings to Normal and Fault Conditions
A DC power circuit breaker must match both normal load and fault conditions. Start with continuous current, system voltage, conductor size, and expected ambient temperature. A 100 A load does not always justify a 100 A breaker. Heat, enclosure ventilation, and long-term loading can require derating. Field reviews often find this detail overlooked.
Check the breaker’s DC voltage rating for the actual circuit configuration. Series-connected poles may have different limits than a single pole. More importantly, compare the interrupting rating with the prospective short-circuit current at the installation point. Battery strings, capacitors, and parallel supplies can deliver severe fault energy. Do not rely on a battery management system alone. It may react too slowly, or fail during a wiring fault. IEC 60947-2 requires verification of performance under specified short-circuit conditions, including the intended DC voltage and test current.
DC arcs are persistent because DC has no natural current zero. Select a breaker with a suitable trip curve, magnetic response, and polarity arrangement. The IEA’s Global EV Outlook 2024 reported nearly 14 million electric car sales in 2023, showing how quickly high-current DC systems are expanding. That growth increases the importance of dependable protection. A useful design check is simple: calculate normal current, maximum fault current, and cable heating separately. Then compare all three with the breaker data sheet. One weakness remains common: designers sometimes use nominal battery current instead of the worst-case fault value. That shortcut needs reconsideration.
Choose the Appropriate Trip Curve and Protection Speed
Tip 1: Match the trip curve to the circuit’s normal startup current. Motors, pumps, and capacitive loads may draw several times their running current.
Tip 2: Select protection speed according to the hazard. Fast tripping limits short-circuit energy, but excessive speed can cause nuisance interruptions during brief inrush events. Check the conductor size, fault level, and equipment tolerance together. A breaker that trips instantly is not automatically the safest choice.
Tip 3: Study the manufacturer’s time-current curve carefully. Do not rely only on the rated current printed on the device. The curve shows how quickly the breaker responds at different fault currents and temperatures. In practical panel reviews, this graph often reveals coordination problems hidden by simple ratings.
Tip 4: Consider whether the load is sensitive to voltage drops. Control electronics may need faster isolation than a rugged heating element.
Tip 5: Coordinate upstream and downstream breakers, so the nearest protective device trips first. Poor coordination can shut down an entire DC system unnecessarily. That shortcut can be expensive.
Tip 6: Allow for ambient temperature and enclosure heating. Thermal trip behavior may change inside a crowded cabinet.
Tip 7: Test the selected curve against real operating data, not assumptions. Record startup current with a suitable meter, then compare it with the curve. I would still review the decision after installation, because field conditions can differ from calculations. The choice is rarely perfect.
Evaluate Poles, Interrupting Capacity, and Installation Space
Choosing the right DC power circuit breaker requires more than matching voltage and current. Start by confirming the system voltage, continuous load, conductor size, and fault level. Then check the poles. A two-pole breaker may disconnect both conductors, while a single-pole device may leave part of the circuit energized. Grounding arrangements can change this decision. Consult IEC 60947-2 or the applicable national standard before selecting a configuration.
Interrupting capacity is critical. The breaker must safely stop the highest prospective short-circuit current at its installation point. IEC 60909 calculations can estimate this value, but actual battery impedance, cable length, and parallel strings matter. The IEA Electricity 2024 report expects global electricity demand to grow by more than 1,000 TWh annually through 2026. More electronic loads may increase DC distribution and fault-management pressure. Do not use a convenient rating. Verify the tested DC interrupting rating, not only the AC figure.
Installation space deserves equal attention. Measure cabinet depth, terminal clearance, bend radius, heat dissipation, and access for torque tools. Uptime Institute’s 2024 survey reported that 53% of respondents experienced an outage costing over $100,000. A crowded enclosure can make inspection and replacement slower. Field practice shows that drawings often underestimate cable movement. Leave service space. Recheck it on site. A neat layout can still be difficult to maintain, and that is where my own selection process needs more skepticism.
7 Tips to Choose the Right DC Power Circuit Breaker? - Evaluate Poles, Interrupting Capacity, and Installation Space
| Tip | Selection Dimension | Typical Data to Evaluate | Practical Selection Guidance | Example Application |
|---|---|---|---|---|
| 1 | System Voltage | 24 VDC, 48 VDC, 110 VDC, 125 VDC, or 220 VDC | Choose a breaker with a DC voltage rating equal to or higher than the maximum continuous system voltage. DC ratings are not automatically interchangeable with AC ratings. | A 48 VDC battery system requires a breaker specifically rated for at least 48 VDC on the intended number of poles. |
| 2 | Number of Poles | 1-pole, 2-pole, 3-pole, or 4-pole configurations | Use the number of poles required to isolate the circuit conductors. Confirm whether all poles are rated for switching and interruption at the selected DC voltage. | A two-pole arrangement may be used to disconnect both positive and negative conductors in a floating DC circuit, subject to the system design and applicable code. |
| 3 | Continuous Current Rating | Common ratings: 6 A, 10 A, 16 A, 20 A, 32 A, 63 A, 100 A, and 125 A | Select a rating above the normal operating current while maintaining overload protection for the conductors. Consider continuous-load rules, ambient temperature, and cable ampacity. | For a 20 A continuous load, the final rating depends on local electrical rules, conductor size, installation method, and the breaker’s permitted loading. |
| 4 | Interrupting Capacity | Typical DC ratings: 2 kA, 4.5 kA, 6 kA, 10 kA, and higher | The interrupting rating must be equal to or greater than the prospective short-circuit current at the installation point. Check the rating at the actual voltage and pole arrangement. | A high-capacity battery bank may deliver several kiloamps of fault current, so a 2 kA breaker may be unsuitable even when its current rating is adequate. |
| 5 | Trip Characteristic | Thermal-magnetic, magnetic-only, electronic, and time-current curves | Match the trip response to load inrush, motor starting current, capacitive input current, and conductor protection requirements. Avoid nuisance tripping without sacrificing fault protection. | A motor-driven DC load may require a trip profile that tolerates short starting surges while still clearing sustained overloads. |
| 6 | Installation Space and Mounting | DIN rail or panel mount; typical widths of 18 mm per module for compact devices | Verify breaker width, height, depth, terminal clearance, bend radius, ventilation, busbar compatibility, and accessibility inside the enclosure. | A two-pole compact breaker may occupy approximately 36 mm of modular rail width, but terminal and wiring clearances still need to be checked. |
| 7 | Environment, Standards, and Accessories | Operating temperature, humidity, pollution level, terminal type, auxiliary contacts, alarm contacts, and shunt trip options | Confirm compliance with the applicable electrical standard and enclosure requirements. Apply temperature derating where specified and select accessories needed for monitoring or remote control. | A control cabinet in a hot location may require a lower continuous load or an enclosure with improved heat dissipation. |
Verify Standards, Environmental Conditions, and Maintenance Needs
7 Tips to Choose the Right DC Power Circuit Breaker?
Verify the applicable safety standards before comparing prices or dimensions. A DC breaker should match the system voltage, continuous current, and available fault current. Check its interrupting rating carefully. DC arcs can remain intense after contacts separate. Confirm polarity requirements, terminal markings, and coordination with upstream protection. Certification alone is not enough. The complete installation must also follow local electrical codes and documented test procedures.
Environmental conditions can change a suitable breaker into a weak point. Record the highest and lowest temperatures near the enclosure. Consider altitude, humidity, dust, salt mist, vibration, and direct sunlight. A coastal cabinet may need stronger corrosion protection. A dusty plant may require a sealed enclosure. Allow space for heat dissipation. Small details matter. I have seen ratings selected from room temperature, although the cabinet regularly exceeded that value.
Maintenance needs deserve equal attention. Choose a design with accessible terminals, clear status indicators, and available replacement parts. Inspect connections for discoloration or looseness during scheduled shutdowns. Use calibrated equipment for insulation, trip, and thermal checks. Keep records of test dates, measured values, and unusual noise or heating. Maintenance plans are often too optimistic. A breaker that cannot be tested safely will eventually become a blind spot. Recheck the selection after upgrades, because added loads can change fault levels and operating temperatures.
